Carrying on from the last post, Running Glassfish 3 with Docker, this post will continue to making use of the Docker Image.
I’m a fully paid-up IntelliJ user, and so I use IntelliJ Ultimate Edition for development work. This isn’t vastly expensive, being around the £15 to £20 a month area (a very small percentage of your earnings as a professional), but you can actually do this via the free Community Edition, so I’ll demonstrate using that.
You can download IntelliJ from the JetBrains website.
Setting up Docker in IntelliJ Community Edition
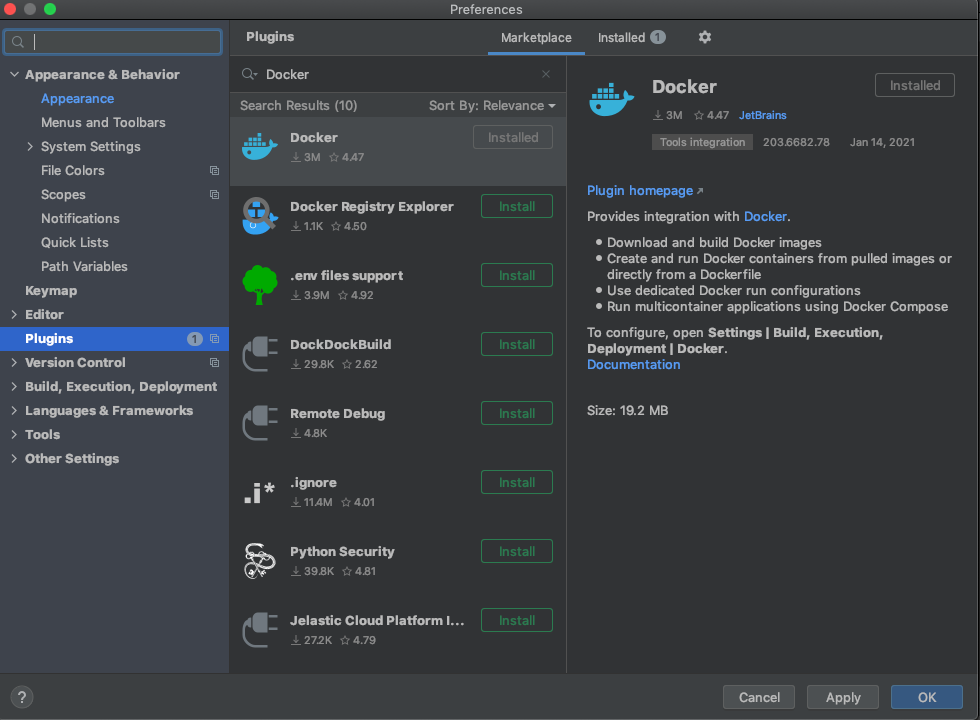
It won’t already be set up, or at least it wasn’t when making this guide, so you will need to Install the Docker plugin first.
This can be done via Preferences > Plugins, then search for ‘Docker’ in the Marketplace tab:
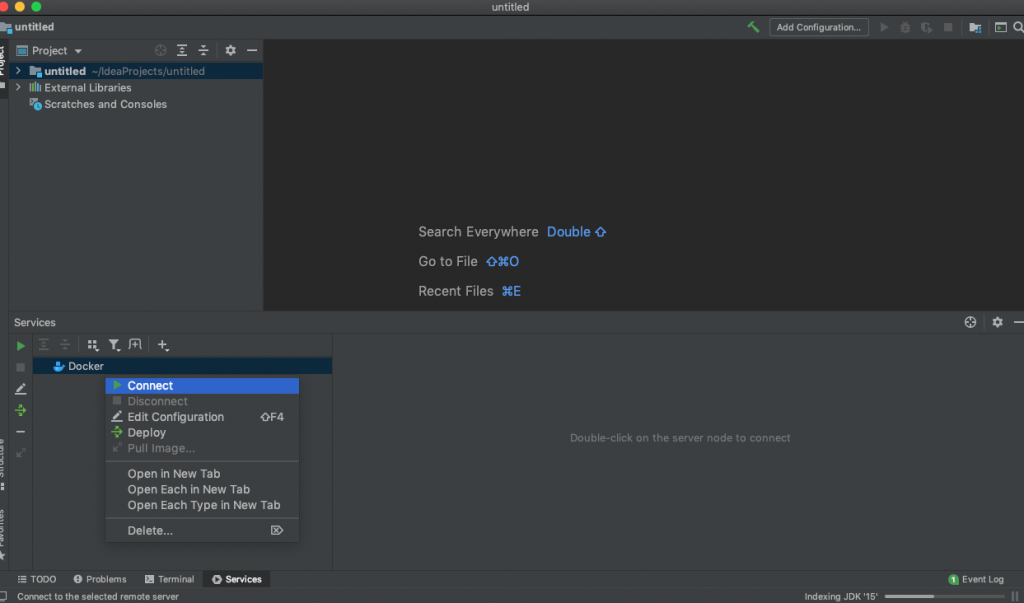
Once Docker has installed, the Docker pane should open at the bottom of the Workspace. Right click the Docker instance and select ‘Connect’:
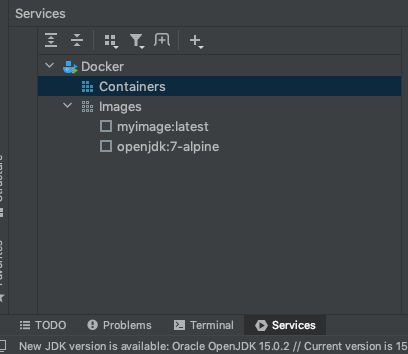
You should now see the images you used in the previous step; the ‘myimage’ (or whatever you named it) and the ‘openjdk’ image we used to make that one.
Starting a Container with Exposed Ports
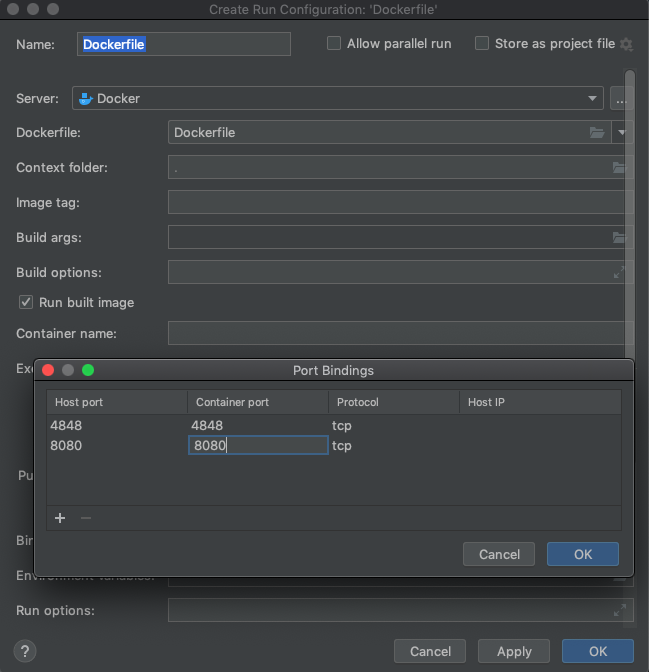
Starting where we actually left off, we need to expose the ports for Glassfish on our container.
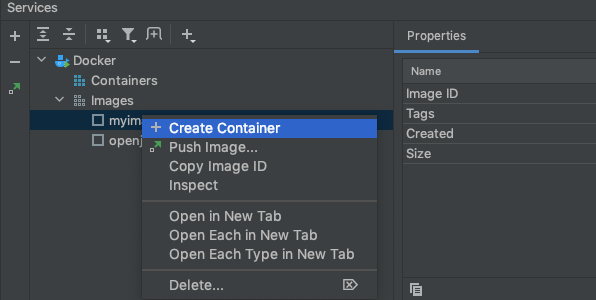
Right click your image and select ‘Create Container’:
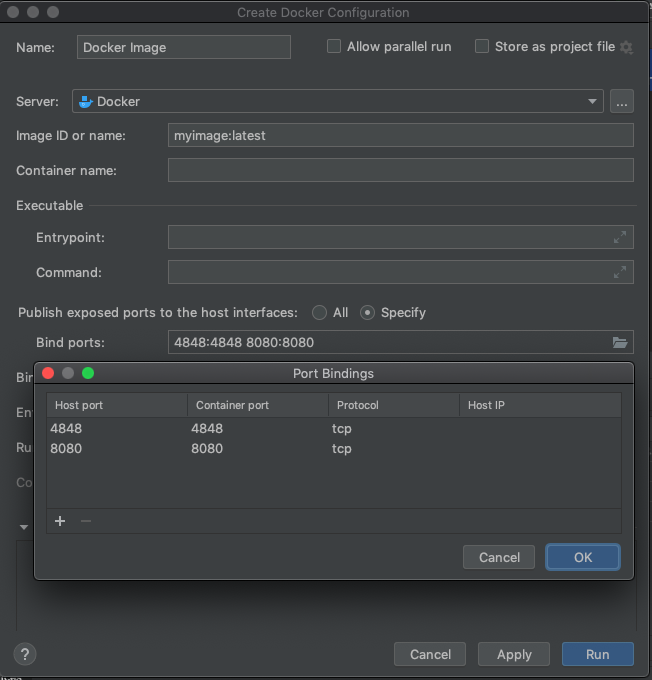
In the window that opens, click the folder on the ‘Bind Ports’ input and set the ports you want to bind. For a default, unfettled, Glassfish domain, this is likely to be 4848 for the Admin port, and 8080 for the Web port:
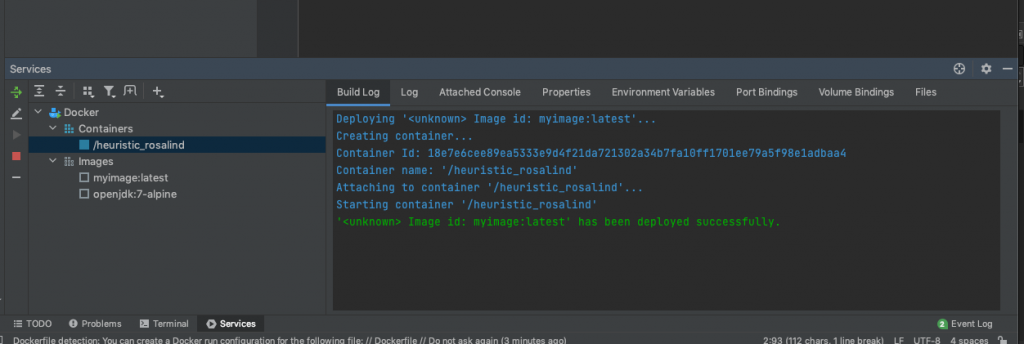
Once you’ve set the ports, click ‘Run’. This should start a container. The build log should successfully deploy the container:
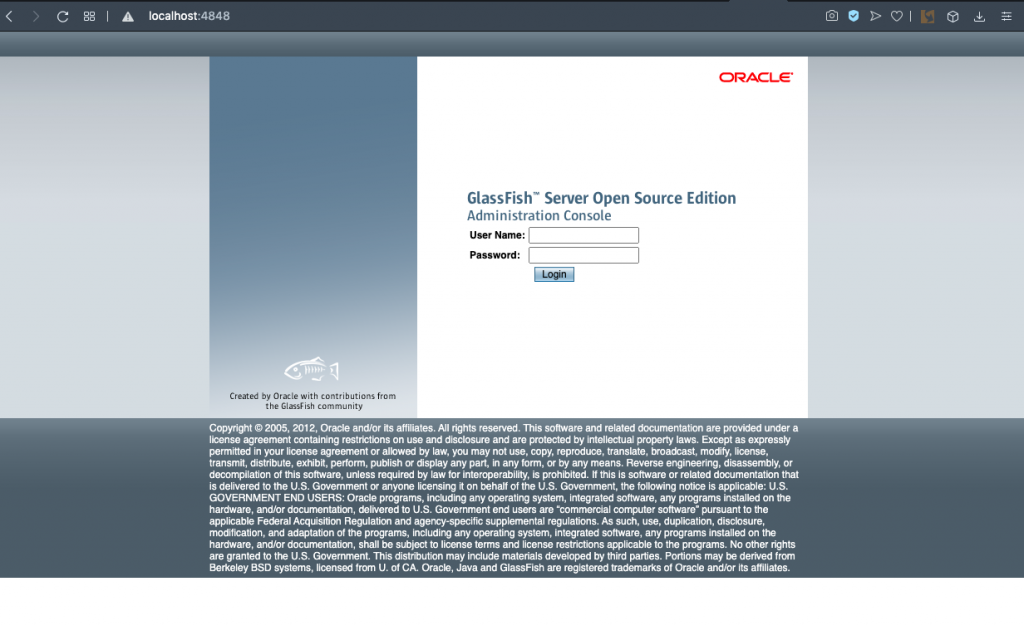
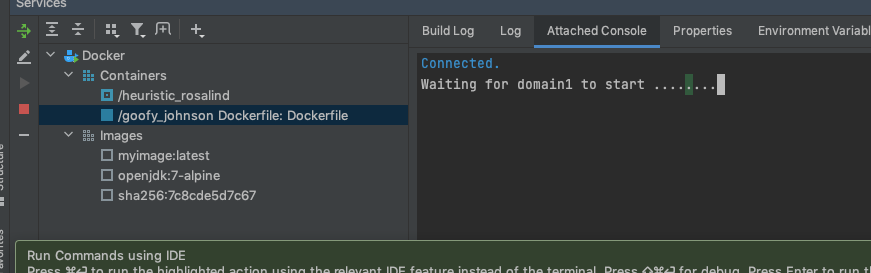
In the ‘Attached Console’ you should see the tailed log for the server. As can be seen, this has started successfully with an admin port of 4848.
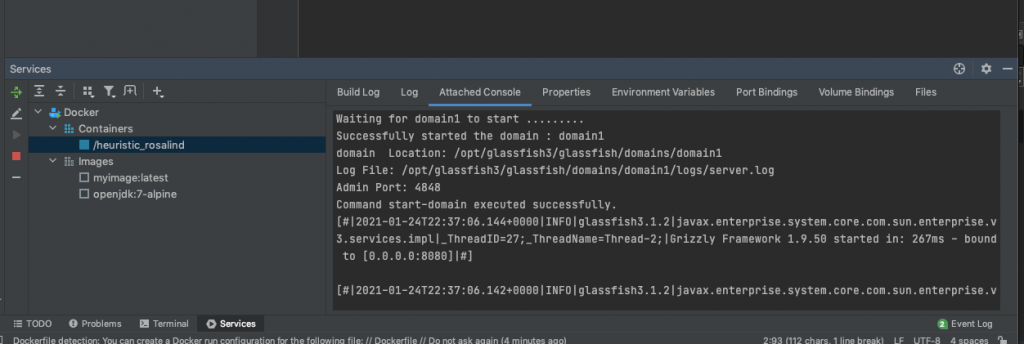
This means we should now be able to access the admin console of the Glassfish instance of the container by visiting localhost:4848.

We now have a different conundrum; Secure Amin isn’t enabled, so we can’t log in. We could access the console for the container and enable it, but it’ll reset each time. Not ideal.
Solving the Secure Admin issue
There’s a few ways around this:
- You can ignore it (perhaps your deployed item doesn’t need a connection pool or any other reason to log in to the Admin console?)
- You can create the original image with a pre-configured domain copied over (remember that
COPYbit in the previous post’s Dockerfile?) - Or, you can copy over the domain’s
configfolder each time in a Dockerfile
The last option is quite useful, as it means you can also have a more fluid deployment option, but for now we’ll look at the second option and make a better image.
Configuring the Domain
If you haven’t already got a domain.xml file all set up with secure admin enabled (let’s pretend this is your only way to get Glassfish running) then you will need to use the original image to get started.
With a container for that image running, we can use the CLI and change this in Glassfish’s ‘asadmin’.
Starting the domain with the command line
As per our Dockerfile, the Glassfish bin directory should be available on the path, meaning we can simply use the command asadmin from anywhere on the command line inside the container. We need to start our domain before asadmin can modify it, so we’ll do that now.
Once asadmin is running, enter the command (amending the domain name to suit):
start-domain domain1All being well, the domain should now start.

Admin Keyfile
The Admin Keyfile stores the admin password for logging into Glassfish. You can’t enable secure admin if you don’t have a password, and one isn’t available in domain1 by default.
The command to do this is (amending the domain name to suit):
change-admin-password --domain_name domain1
You should be able to see that only the Admin Keyfile has changed:

We can now look to enable secure admin
Enabling Secure Admin
With our domain now running, we can use the following command, (amending the admin port if you’re using something different):
enable-secure-admin --port 4848
(If you get an error saying the domain isn’t running, start it using the previous step)
Now, as per the instructions, we will restart the domain.
restart-domain domain1
Persisting the config changes
We can copy these changes out to our computer by using the docker cp command, as demonstrated below on a Windows environment. This command will copy the domain’s config directory to our Windows Desktop:

This may take a short while to run, but once it’s done you should see something like this:

Option 1: Amending the Dockerfile to create a new Image
We can now copy the config file to our original Dockerfile folder and use it to create a new image (avoiding the need to do this each time).
This can be done by adding in a step to copy over our new config directory onto the default domain1 domain.
FROM openjdk:7-alpine
# Install a few basic bits
RUN apk update && \
    apk add wget nano unzip bash pwgen expect
RUN wget http://download.oracle.com/glassfish/3.1.2.2/release/glassfish-3.1.2.2.zip && \
    unzip glassfish-3.1.2.2.zip -d /opt && \
    rm glassfish-3.1.2.2.zip && \
    rm -rf /var/lib/apt/lists/* && \
    rm -rf /opt/glassfish3/glassfish/domains/*
ENV PATH /opt/glassfish3/bin:$PATH
# Copy over our domains and any external libraries we need
COPY config /opt/glassfish3/glassfish/domains/
domain1/config/
COPY ojdbc /usr/lib/jvm/java-1.7-openjdk/jre/lib/ext/
COPY glassfish.sh /opt/glassfish3/glassfish.sh
WORKDIR /opt/glassfish3/
LABEL maintainer="chris@cjack.uk
# Copy our entrypoint script over
ENTRYPOINT ["sh", "glassfish.sh"]
We’ll now just need to build the image again, as per the previous blog post.
docker build . -t myimageThen, once the image has build, spin it up with the port bindings:

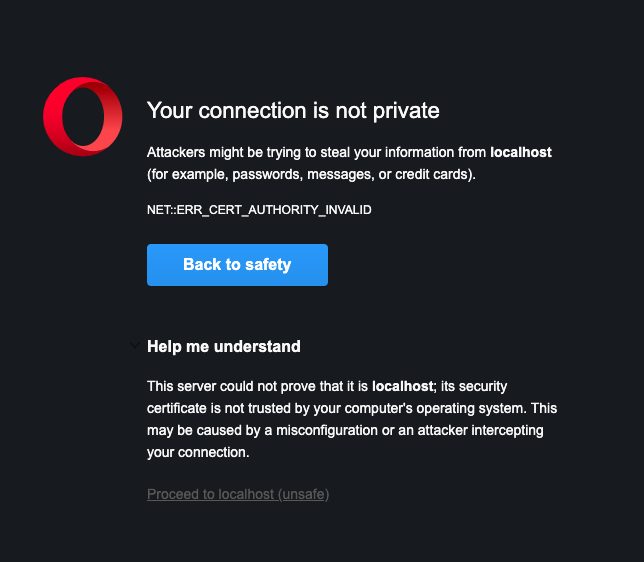
You will have a good idea if this has worked, because secure admin will only work on https. This will manifest itself as an ‘invalid certificate’ warning in the browser (shown here in Opera).
Once you proceed, the admin console will take a short while to install. You should soon see the login prompt – without the secure admin error…
You should now be able to log in with the admin username and password you set earlier in the steps.
Option 2: Using a Dockerfile with your new config
Alternatively, you can carry on with the old image and just copy across the config for a new container. It’ll still depend on the parent image, so it’s not as clean, but it is easy to do in IntelliJ.
To do this, we’ll create a new File in the root of our project.
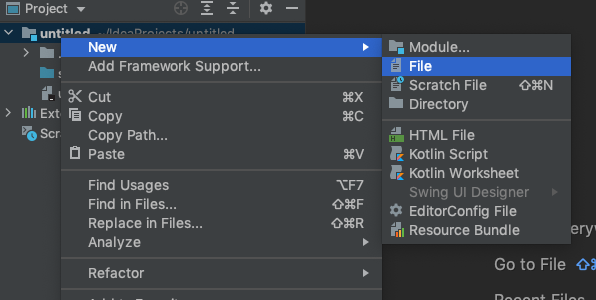
In this file, you can create something like the following, in a file named ‘Dockerfile’:
FROM myimage:latest
COPY config /opt/glassfish3/glassfish/domains/domain1/config/
Remember to replace myimage:latest with the name of your image.
Next, right click the Dockerfile and select ‘Modify Run Configuration’
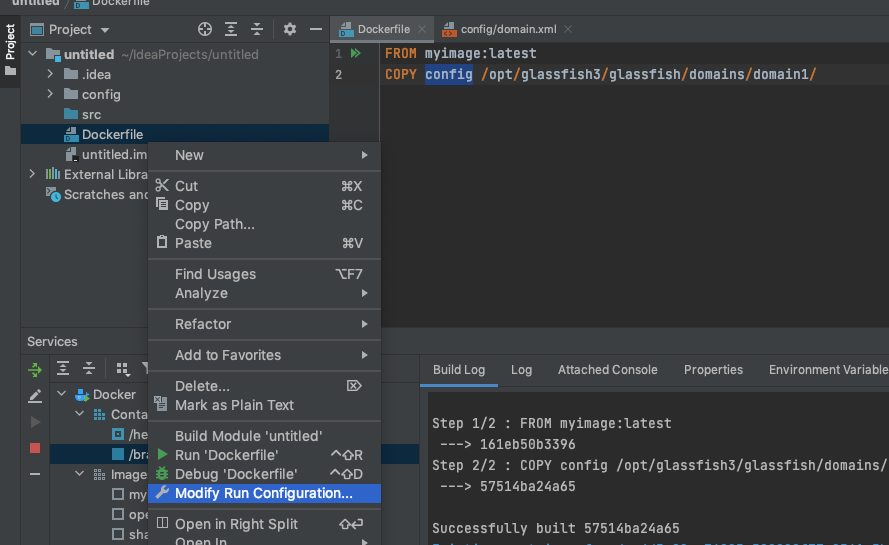
Set the Port Bindings as per the earlier steps – notice that there’s now a value in the Dockerfile input box.
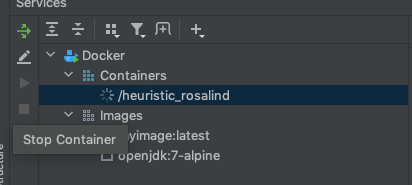
We’ll now stop any running containers
And we’ll start our a new container using our Dockerfile Run Configuration
Automatically Deploying an EAR
You can now go about setting up your container to start with a deployment automatically. You can do this by adding the following to your Dockerfile, if you’ve use the previous step. If not, follow the previous step and skip the config copy, substituting it for the below instead.
COPY MyModule/target/MyApplication*.ear /opt/glassfish3/glassfish/domains/domain1/autodeployReplace the first part of the COPY argument to the path of your item that you want to deploy. Also amend the target domain name in the autodeploy directory, if you’re not use the default domain1.
In this example, we’re assuming I have a module named MyModule that builds an application named MyApplication-0.0.1.ear, or similar, where the version number is appended (we want this to be somewhat dynamic).
The idea is that we would, for example, run a Maven package command to build an ear, then use the target output in our container. This Dockerfile will copy the EAR into the domain’s autodeploy directory before the domain is started.
You should now be able to run a Container using this run configuration, and each time the latest build of the EAR should deploy when Glassfish starts in the container.