Glassfish 3 is getting on a bit now. The final version of that generation, 3.1.2.2, was released in July 2012 – at the time of writing, that was some 8 and a half years ago.
Glassfish 3 won’t run on Java 8, and so one solution, up until now, would be to have a JDK specifically for Glassfish (and maybe other legacy Java instances). That has previously been my chosen strategy, but IDE integration is also a key part of the requirement – being able to easily deploy to and debug an application is often a daily activity.
This is fine, and can be done quite easily, but I some time ago ran into an issue now that Java 8 is also getting a bit leggy – IntelliJ, my IDE of choice, started to want to run on Java 11.
Attempting to use a Glassfish 3 Application Server would give the following warning:
“GlassFish Server before 4.x do not support Java 9 and later versions. Either use Glassfish Server 4.x or restart IntelliJ IDEA on JRE 8”

That’s also been fine in the past – IntelliJ has a ‘Choose Runtime’ plugin that allows Java 8 to be the SDK that IntelliJ would run on.
Things have changed, as of somewhere around version 2020.3, and IntelliJ will now no longer run on JRE 8. As a result, Glassfish 3 in IntelliJ is official dead. Sort of. You can still bodge Glassfish 3 to run, but it won’t deploy. And it won’t know it’s started successfully. Not at all fit for purpose.
In addition to all this, it’s not uncommon (in my experience) to find colleagues spending a lot of sprint time simply trying to get Glassfish to run correctly, or to get an application to deploy correctly. It’s simply not a polished version of the Application Server, and Stack Overflow is littered with tales of woe whose solution is “It’s fixed in GF4+”. But what if upgrading isn’t an option?
One answer, of course, leads us onto the topic of this post. Docker.
Docker
I won’t go into too much detail around what Docker is – there’s plenty of that out there. In simple terms, it’s a way of running virtualised Linux environments in a fixed state. A bit like Virtual Machine, but with a lot more flexibility.
The key advantage is this approach is that it should eliminate all instances of “It works on my machine”. As well as that, it allows Glassfish to be started and run from a fixed origin point; avoiding any changes to the application or configuration that might occur in the process of using it, and allowing the ‘environment’ to be destroyed and re-created from the known working start point.
The Dockerfile
So what do we need? Well, first of all we’ll need a Dockerfile.
A Dockerfile is a series of instructions that tell Docker how to create the initial ‘image’ of the environment. For the starting point (FROM) I’m using an OpenJDK Docker image. These can be found on https://hub.docker.com/_/openjdk in different flavours. OpenJDK 7 Alpine suits what I needed, but you can of course tweak it to a different release if you need to.
Watch out if you make a Dockerfile on Windows. The linefeed/returns are different and won’t run correctly on Linux. This will manifest itself as some strange and unsuccessful build behaviour.
Anyway, the Dockerfile we’ll use is this:
FROM openjdk:7-alpine
# Install a few basic bits
RUN apk update && \
    apk add wget nano unzip bash pwgen expect
RUN wget http://download.oracle.com/glassfish/3.1.2.2/release/glassfish-3.1.2.2.zip && \
    unzip glassfish-3.1.2.2.zip -d /opt && \
    rm glassfish-3.1.2.2.zip && \
    rm -rf /var/lib/apt/lists/* && \
    rm -rf /opt/glassfish3/glassfish/domains/*
ENV PATH /opt/glassfish3/bin:$PATH
# Copy over our domains and any external libraries we need
COPY domains /opt/glassfish3/glassfish/domains/
COPY ojdbc /usr/lib/jvm/java-1.7-openjdk/jre/lib/ext/
COPY glassfish.sh /opt/glassfish3/glassfish.sh
WORKDIR /opt/glassfish3/
LABEL maintainer="chris@cjack.uk
# Copy our entrypoint script over
ENTRYPOINT ["sh", "glassfish.sh"]
As per the comments in the Dockerfile above, the image will first get the OpenJDK 7 build, install Wget, Nano, Unzip, Bash, Pwgen, and Expect packages, then it’ll use Wget to download the Glassfish 3.1.2.2 release. Part of this step deletes the default ‘domain1’ domain (see below).
This will be installed in /opt/glassfish3 on the docker image, and the bin directory will get added to the Path.
Next, we copy some files from the Dockerfile directory onto our image. This involves:
- Copying over a base ‘domain’ to use (this is optional. You can comment/remove the aforementioned deletion of the default domain and use that, if you prefer. )
- Copying any external libraries that Glassfish may need (for example, database drivers)
- Copying the Entrypoint script that will start Glassfish when the container is loaded.
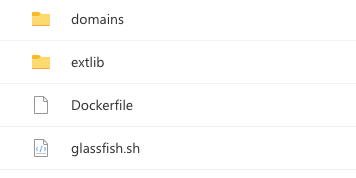
As a result, you will have a folder layout like this:
The Entrypoint script, glassfish.sh, is quite simple and looks like this:
#!/bin/sh

/opt/glassfish3/bin/asadmin start-domain $1

tail -f /opt/glassfish3/glassfish/domains/$1/logs/server.log
(The $1 allows a domain name to be passed as an argument. You can substitute this for a fixed domain if you don’t need to use this as the basis for a few different domains)
The domain is started and then the log is tailed immediately after this.
Building the Image
Next we will use the Dockerfile to build the image. At this point I’ll assume you have Docker correctly installed and on the Path of your OS.
From within the same directory as the Dockerfile, type:
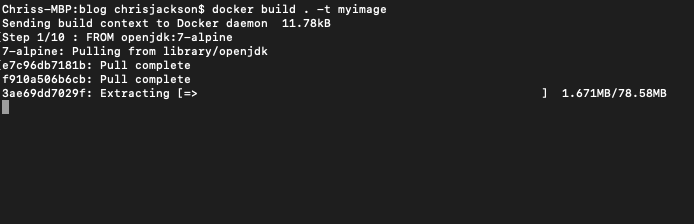
docker build . -t myimageThe . is for the path to the Dockerfile. It’s in the same folder as we’ll be running the command, and is the only one in there, so it’s just a quicker way to do it.
-t allows an image name to be specified (in this case, ‘myimage’). This will be useful for if you want to integrate this into an IDE a bit ‘slicker’.
When you run the command, Docker should start to build the image:
When this has complete, you should see something like the following:

Running the Docker Image
This is the easiest bit. You should now be able to start the image by running:
docker run myimage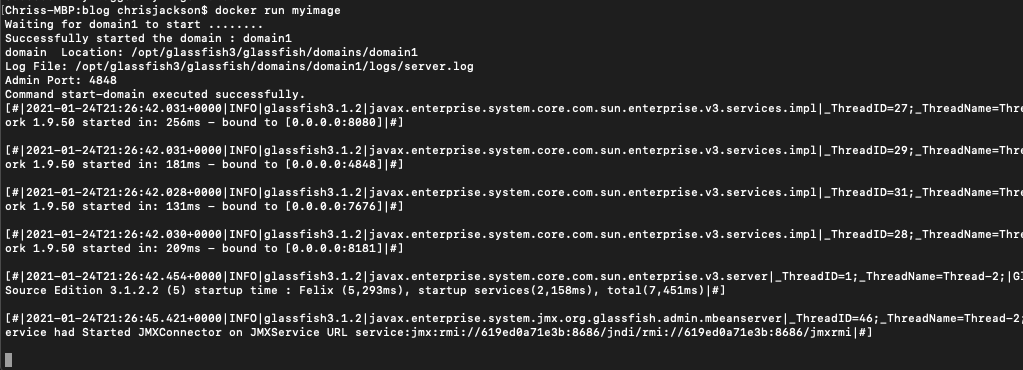
Of course you’ll want to swap myimage for the name of your image, and add a domain name to the end if you opted to retain the $1 argument placeholders in the Entrypoint script.
We haven’t configured enough to use Glassfish yet – it is currently running on Ports in the container that we can’t access yet. That will come next.